Friday 23 November 2012

Update on enlarger lenses

Firstly, a subdued apology. This blog is, of course, just a blog. It can only record what I am doing as I do it, and how in my opinion the various experiments go. Unfortunately the day-job gets in the way, and demands time at evenings and weekends too unfortunately. So I missed my last weekly post.

Update on enlarger lenses

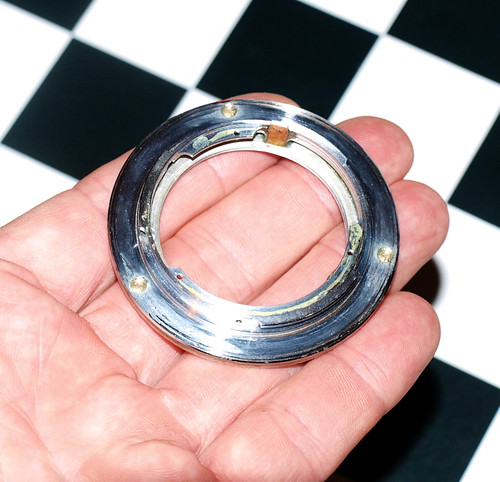
There are a few internet articles and a couple of flickr groups about using enlarger lenses on a camera. This is certainly a subject that interests me a lot. Enlarger lenses are known to be very good as macro lenses. (Sometimes they need to be reversed.) Enlarger lenses (to a certain extent) and process lenses (to a greater extent) have been used on large format cameras for a long time to take "ordinary" photographs, even with focus at infinity. I certainly use lenses like this on my larger cameras. The challenge is to set up a "small camera" such as a 35mm SLR or DSLR to use enlarger lenses for "normal" photographs.

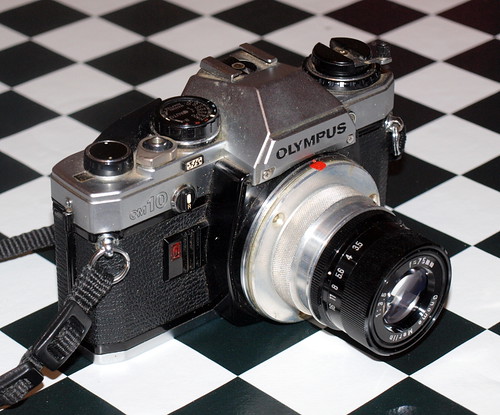
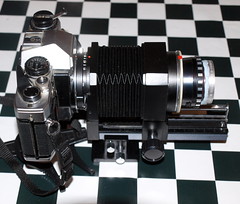
With my 90mm Rodenstock Ysaron and -2 telek lens combination (already described) that is appropx 100mm in focal length and looks like this

OM10 with bellows, Ysaron 90mm enlarger lens and telek lens

I shot a number of phots, one of which was

Fallen leaves

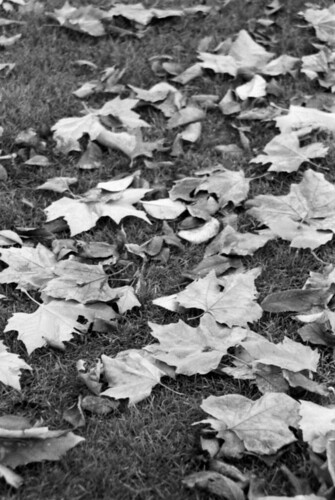
This is pretty normal by my standards. I like the limited depth of field one gets. The shot isn't amazingly sharp, but it is completely adequate and it would be difficult to tell it wasn't taken with a normal lens. This lens would make an excellent portrait lens, and the bellows were rather easy to use as a focusing device.

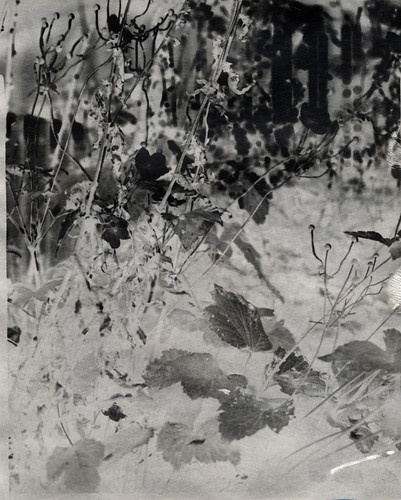
With my 75mm Gnome merlin lens,

OM10 with Gnome Merlin 75mm f3.5 enlarger lens

I shot this

Curzon Street Railway Station

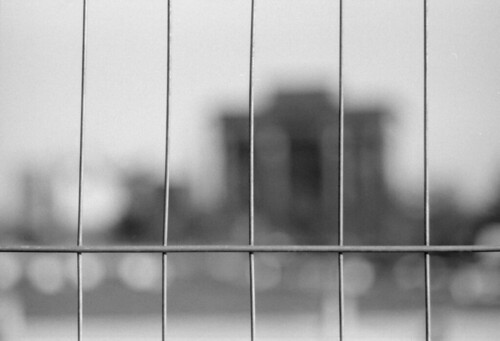
Again, the lens is perfectly adequately sharp. The main problem here is lack of focusing. The lens needs to be too close to the camera to allow bellows to be used so I am relying on swapping different extension tubes, and using my feet a lot. This made the lens very inconvenient to use, and is something I must think more about.

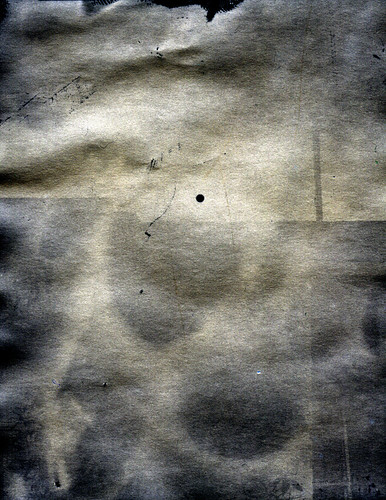
But maybe bad is good?

On the other hand, I'd have never spotted that shot without trying unfamiliar equipment in unfamiliar ways. I know there are photographers who never feel comfortable unless they know their equipment really well. I feel that about subject matter: I never take a really good photo of unfamiliar subjects the first time I see them. Photography for me is (and I think this is how it should be) an art of looking and understanding the subject really well before one starts shooting. On the other hand, I am the sort who can rarely be really creative with highly familiar equipment and find I spot photos much better with different equipment. In other words I like to change the lens, change the camera, or even change the film regularly, just to give me a fresh view of something familiar.

I suppose we all need to find our own way of working, and I am not necessarily recommending mine, just saying what it is and why it seems to work for me. In the case above, the shot was got because I had the enlarger lens on the camera with the wrong extension tube on and had to search for some focus and some new view with unfamiliar kit.

Sunday 11 November 2012

Using enlarger lenses

On "full frame" 35mm cameras and digital cameras with full frame sensors, the focal length from about 75mm to 100mm is incredibly useful, and not just for portraits, which is what many people think of this kind of lens as being "for". These lenses helps in composing, by being a little more selective in the view, but without losing the perspective completely. They also help by giving pictures a narrower depth of field.

Unfortunately, in the 1970s and 1980s, from whence most of our second-hand prime lenses come from, lenses of this type were not so common: the typical amateur seemed to jump from 50mm to 135mm and the space in between was a limited niche for professionals with a lot more money available. The result is it is quite difficult to get inexpensive lenses in this rather useful range.

I have been experimenting with alternatives. One of these is to use enlarger lenses, which were made in 75mm, 80mm, 90mm and 105mm focal lengths for medium format, and are now very easily and cheaply available.

Enlarger lenses on full-frame 35mm

Here I have used an old Olympus OM10 as my camera body. You could use any SLR or DSLR. The automatic Olympus cameras had an advantage that is quite useful: since they meter light off the back of the shutter curtain and off the film the actual settings presented to the camera by the lens are unimportant, so there's a better chance of getting accurate exposures. But other cameras will be able to get the exposures by other means.

The first, and main difficulty is to mount the lens. Enlarger lenses typically used a "Leica screw mount" or L39 mount (sometimes called M39, but that's not 100% accurate). I took a flange from an enlarger and the metal mount of a broken lens and glued them back to back to make an adapter.

Homemade OM/L39 adapter

With the adapter you should be able to mount the lens, but be careful it doesn't foul up the SLR or DSLR's mirror. (Some enlarger lenses protrude quite a long way back, I found.) The main problem is now setting the lens the right distance from the film to achieve focus. You might have extension tubes or bellows that will help here. I used an old L39 extension tube with a 75mm enlarger lens in this set-up.

Don't be put off by the fact the enlarger lenses are often quite small.

OM10 with Gnome Merlin 75mm f3.5 enlarger lens

As it happens, that gives me infinity focus. There is a tiny amount of adjustment available by screwing and unscrewing the lens a little way in the adapter. Or you can change the extension tubes you are using, or else get used to walking backwards and forward to get your subject in focus!

Don't forget the closer the lens is to the camera the further away it focuses, up to "infinity focus" after which bringing the lens still closer will not help focus on anything.

Enlarger lenses differ in their best focusing position. You will have to experiment. Sadly, it seems that the lenses of the most useful focal length want to be rather too close to the camera to allow a bellows to be used instead of extension tubes. But you may be lucky.

In the following I used a bellows with a 90mm lens.

OM10 with bellows, Ysaron 90mm enlarger lens and telek lens

The real advantage of the bellows is that it provides a focus control. As it happened, the bellows held the lens too far out to focus on infinity. That might not have been a problem if I was using the lens for portraits, but to get infinity I used an old friend - the negative telek lens I used a couple of posts ago. The telek (attached to the front this time) increases the focal length to about 100mm, a little longer than I wanted, but at least it gives infinity focus with this particular set of bellows.

My results from these lenses today are still drying after having been developed. I'll post an update shortly with some of them!

Saturday 3 November 2012

Kodak Linagraph Paper

I was experimenting with some stuff called Kodak Linagraph paper today. I really can't find much about it on the web, but it seems rather wacky...

Kodak Linagraph paper

Paper negatives

My favourite quick-and-cheerful method for testing new equipment, especially lenses, is to use paper instead of film in the camera. This can be done with any size camera - you need to cut photographic paper to size and perhaps tape it in place inside the camera. Of course this has to be done in the dark, but the advantage of paper is that everything can be done with an orange safelight, so there's no fiddling in the dark.

For large format cameras it's especially easy to load film holders with paper. You may need to be prepared to trim the paper slightly because (believe it or not) 4x5 film is smaller than 4x5 paper (that's the surprising bit) and film holders are designed for film not paper (that's less surprising).

Paper can be exposed like film. It is not sensitive to red light or to much green light much, but in daylight that's not much of a problem. Depending on the paper I expose mine at 2,3,4,6 ISO or higher in daylight. 3ISO is five stops slower than 100ISO. I take my light readings at 100ISO and calculate from there. There's a further advantage that exposures are typically a second or more, so shutters can be dispensed with in favour of the old manual method of using the lens cap as a shutter.

The other advantage is that it's easy to have trays of developer set up in the darkroom, so that (at least if you are shooting your tests in the back garden, which is what I do) each shot can be developed and inspected before the next is taken. Paper is also much cheaper than film.

For Ilford Multigrade paper, which is a little on the slow side but is one of the commonest kinds, I use ISO 3 as a starting point. Others are a bit faster.

After processing, the paper is washed and dried as usual and is scanned on a normal flat bed scanner. If your scanner is reasonable you should be able to get enough detail from even a 35mm negative. No special negative scanner is needed. Of course you will need to invert the tones - you might be able to do this in your scanning software, or any digital processing software will do this. (I use the Gimp.) Less obviously, the image you get will be a mirror image, so a "flip" transform (either left-right or top-bottom) may be helpful, but this is easy in software.

Linagraph direct print paper

I got a quantity of this stuff, which looked like it was worth a try. But it's not designed for normal printing. So on this occasion my paper-negative tests were testing the paper, not the lens. I chose a safe, dependable lens (which was in fact an enlarger lens, but quite good enough for the purpose), fitted it to the camera, loaded some of the paper into the holders and had a go.

A typical negative I got looked like this.

Kodak linagraph - negative

After letting the paper dry and then scanning it and processing it, this was the picture I got.

The garden in autumn

Pretty good really. There's a nice warm colour, due to my colour-inversion and the fact the paper is slightly cool. The paper appears to be sensitive to green, unlike normal papers, and is quite fast. (I exposed at 16ISO and developed slightly long at 2.5 minutes in PQ universal developer, 1+9.)

Conclusions

Other people may have found some of this paper, so perhaps my very early conclusions on it so far may be useful.

It is fast, at least one and perhaps two stops faster than normal paper. My sample gave a noticeable grey background, which is OK for negatives but not OK for prints. Next time I will try reducing the development time and increasing the exposure, hoping for better whites. Or a different developer might help.

The paper is very delicate when wet and scratches and other marks are very easy to make.

The instructions on the box say to use safelight filter 2, which is a red filter for fast orthochromatic films. Therefore a normal darkroom filter (which is what I used) may not be sufficiently safe. You should certainly experiment.

The pink colour of the emulsion is slightly offputting at first, but it does go when the paper is processed normally.

Solarisation

I thought it might be fun to try the paper in a completely different way, especially as I had no idea what it was specifically designed for.

The sun was bright so I pointed my camera towards it and set the shutter for a long exposure. (In fact, I used 2 seconds at f/11.) And shot.

My first attempt produced (unsurprisingly) a negative that was completely black. Rather than reducing the exposure I decided to reduce the development time, and to my delight, produced a negative in which the sun was perfectly white. After scanning, inverting colours and maximising the tones in the other areas (which are almost uniformly grey, but the scanner could find some slight differences) this is the image.

Black sun

That's not a negative, but a positive. The sun is quite white on the negative. The other features (for example, a dark doorway to the bottom right) are dark/bright as expected for a positive - everything except the sun.

And it is not hi-fi my any means, and the scratches seem very easy to make on this paper, but this reversal of very bright objects is a lot of fun to do when the materials are right for it. The effect is known, and is usually called "solarisation", but isn't the same as the "Sabbatier effect" (also often called soloarisation, and perhaps something for a future post). Solarisation worked really well with this paper, and much better than conventional paper I tested it against. So this might be an interesting application. More experiments are obviously needed.