Wednesday 12 December 2012

Colour Separations

This is something to try whether you are using film or digital. The technique goes back to Maxwell so is pretty old, and at least in some circumstances is the only way to get a colour photograph from a monochrome camera. The Viking Mars landers used the same method to take colour pictures on Mars. In fact the system wasn't initially calibrated properly, so the colours returned in the first few pictures were wrong, showing Mars's pink sky as blue rather than pink.

Colours and filters

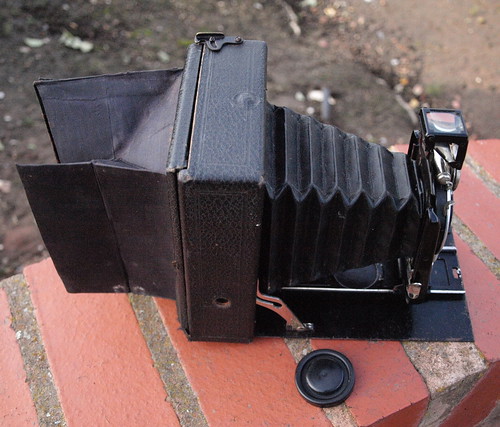
The technique is straightforward. With a camera set firmly on a tripod, take three or more identical monochrome pictures with different coloured filters, and then scan or otherwise combine them to make a coloured image.

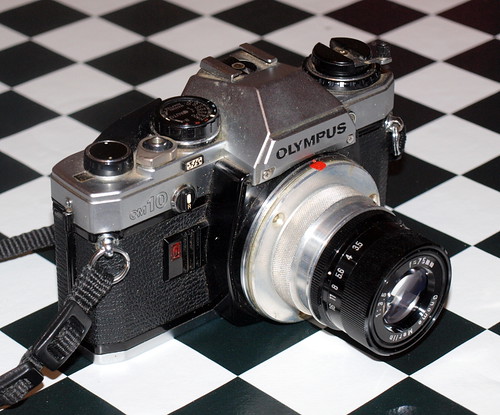
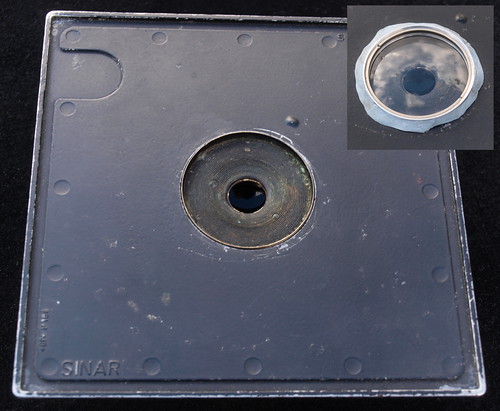
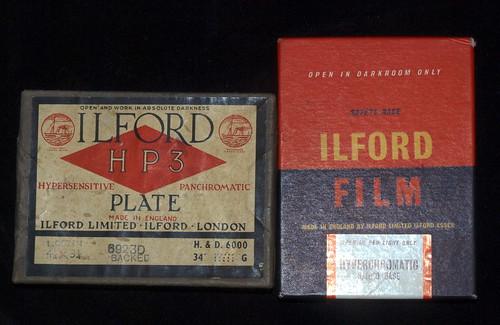
The traditional filters to use are red, green and blue, and the traditional kind of filters are "gelatine" filters (so-called because they were once, but no-longer made from gelatine). I found a number of Kodak "Wratten" gelatine filters and made cardboard mounts for them to fit in a Cokin "P" holder.

Colour separation filters

For the record, the gels I used were: (Wratten numbers) 25 (red tricolour), 61 (deep green tricolour), 47B (deep blue tricolour), and I also tried 34 (violet). There are a number of possibilities, and the combinations I used are perhaps not optimal, but rather more limited by what gels I could source at a reasonable price. You can try anything, but strong blues are quite difficult to find. It might be worth trying a blue colour conversion filter such as 80A but may not be perfect.

Or go for something completely different, and get an unusual effect!

Trying it out

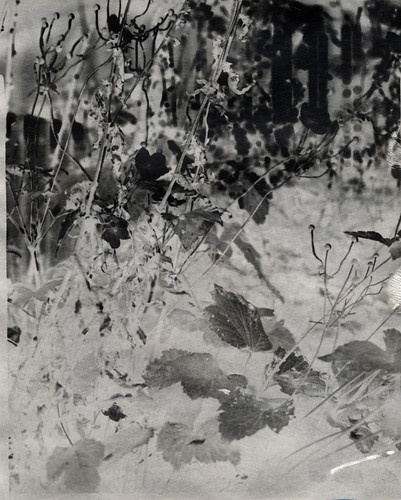
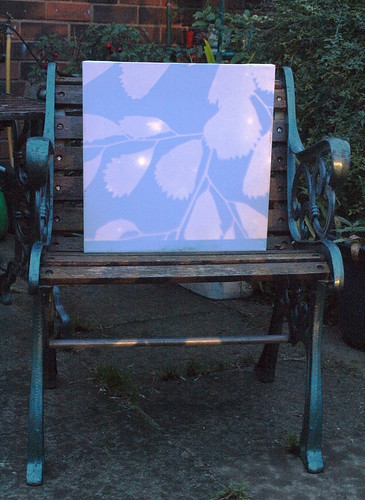
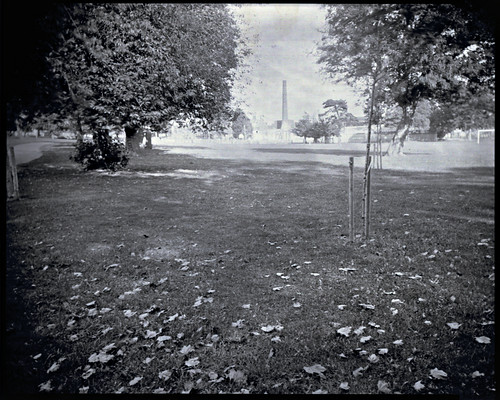
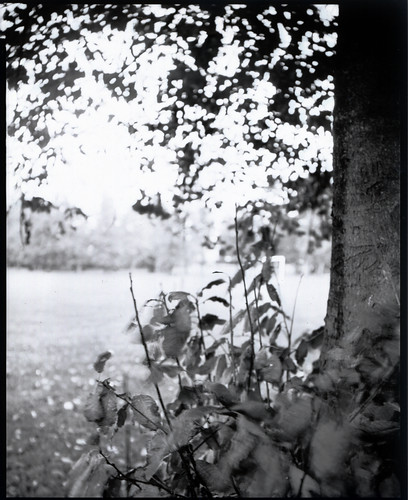
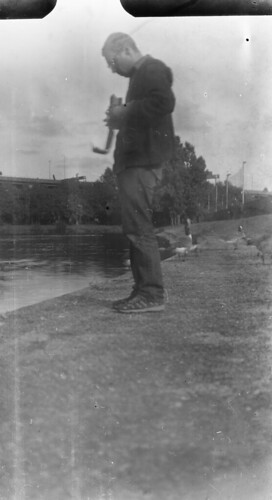
I chose a moderately colourful subject to try it out with.

With tungsten and DSLR's white balance

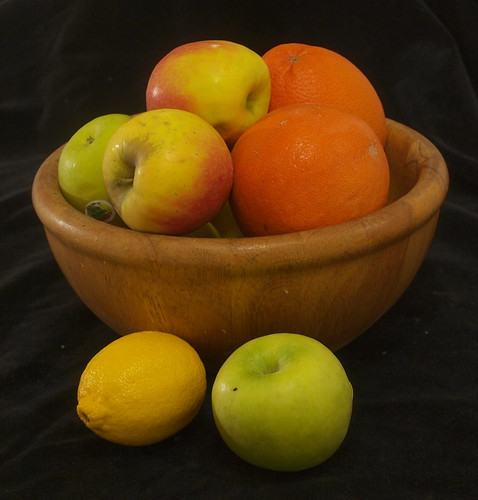
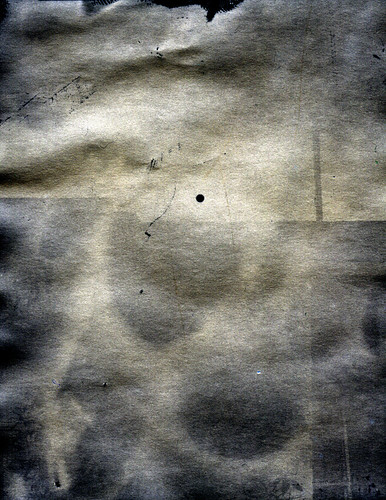
The technique is straightforward, and just as described above. Of course the camera must not move between exposures as you are swapping the filters over. This is a montage of my three coloured shots and (bottom right) the combined image.

Colour separation

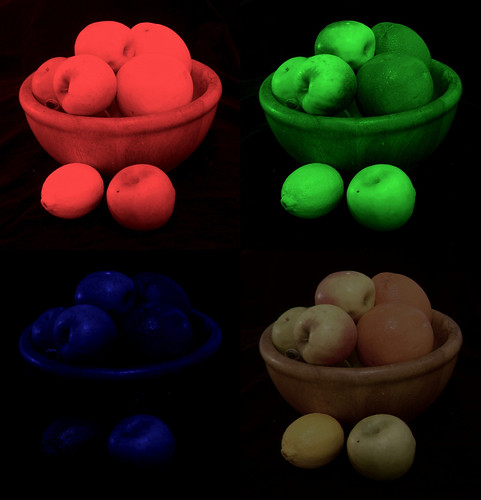
I used the GIMP to combine the three images, by putting them in three separate layers and then altering the transparency of the layers. These layers were monochrome (desaturate if you didn't do so already) and then colourised to the obvious colours of red, green and blue. (For three layers, they contribute equally to the final image when transparency is 100%, 50% and 33%) In hindsight, this wasn't the best method to use as each layer then is 1/3 of its original intensity. It would have been better to simply add the pixel values in the layers but I didn't know (and still don't know) how to do this in the GIMP.

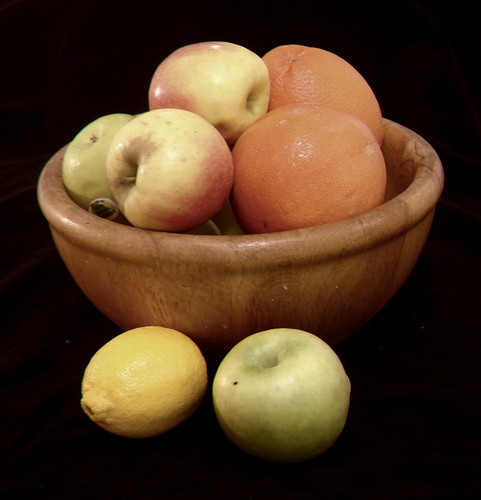
The final result (bottom right) is low in saturation, because of the problem just mentioned but IMHO has rather beautiful colours, despite the very poor lighting I was using for this quick test. Here it is when the saturation problem is resolved.

Combined image

Red, green and blue make white, right?

Finally, a little bit of science. As a teenager I learnt two things from my Physics teacher. (A) A colour of light is just a frequency of light and all colours are essentially equal - nature doesn't choose any one over any other - and white light is a mixture of all possible colours. (B) The three "primary" colours when mixed make white light.

This confused me greatly. I knew enough in the world of maths and electronics to know that component frequencies can be extracted from a mixture, so three specific frequencies (red, green and blue) cannot make the same result as a mixture of all frequencies. So how can red, green and blue make, and also not make, white? My instinct was to believe (A) and the maths, but we were also shown experiments that seemed to prove (B) was right.

The answer is not in the Physics classroom, but in the Biology classroom. And also, maybe, in the English classroom. For when some people say "the three primary colours when mixed make white light" they don't mean this at all, and should be more precise. They mean that when mixed they make something indistinguishable by the human eye from white light. And the eye has three colour sensors - red, green and blue. It is because of Biology, not Physics, that we can separate colours into three and then recombine them again. Aliens from another planet, or indeed other animals on this planet, would probably say (if they could speak!) that our colour images are at best very poor imitations of the real thing.

Friday 23 November 2012

Update on enlarger lenses

Firstly, a subdued apology. This blog is, of course, just a blog. It can only record what I am doing as I do it, and how in my opinion the various experiments go. Unfortunately the day-job gets in the way, and demands time at evenings and weekends too unfortunately. So I missed my last weekly post.

Update on enlarger lenses

There are a few internet articles and a couple of flickr groups about using enlarger lenses on a camera. This is certainly a subject that interests me a lot. Enlarger lenses are known to be very good as macro lenses. (Sometimes they need to be reversed.) Enlarger lenses (to a certain extent) and process lenses (to a greater extent) have been used on large format cameras for a long time to take "ordinary" photographs, even with focus at infinity. I certainly use lenses like this on my larger cameras. The challenge is to set up a "small camera" such as a 35mm SLR or DSLR to use enlarger lenses for "normal" photographs.

With my 90mm Rodenstock Ysaron and -2 telek lens combination (already described) that is appropx 100mm in focal length and looks like this

OM10 with bellows, Ysaron 90mm enlarger lens and telek lens

I shot a number of phots, one of which was

Fallen leaves

This is pretty normal by my standards. I like the limited depth of field one gets. The shot isn't amazingly sharp, but it is completely adequate and it would be difficult to tell it wasn't taken with a normal lens. This lens would make an excellent portrait lens, and the bellows were rather easy to use as a focusing device.

With my 75mm Gnome merlin lens,

OM10 with Gnome Merlin 75mm f3.5 enlarger lens

I shot this

Curzon Street Railway Station

Again, the lens is perfectly adequately sharp. The main problem here is lack of focusing. The lens needs to be too close to the camera to allow bellows to be used so I am relying on swapping different extension tubes, and using my feet a lot. This made the lens very inconvenient to use, and is something I must think more about.

But maybe bad is good?

On the other hand, I'd have never spotted that shot without trying unfamiliar equipment in unfamiliar ways. I know there are photographers who never feel comfortable unless they know their equipment really well. I feel that about subject matter: I never take a really good photo of unfamiliar subjects the first time I see them. Photography for me is (and I think this is how it should be) an art of looking and understanding the subject really well before one starts shooting. On the other hand, I am the sort who can rarely be really creative with highly familiar equipment and find I spot photos much better with different equipment. In other words I like to change the lens, change the camera, or even change the film regularly, just to give me a fresh view of something familiar.

I suppose we all need to find our own way of working, and I am not necessarily recommending mine, just saying what it is and why it seems to work for me. In the case above, the shot was got because I had the enlarger lens on the camera with the wrong extension tube on and had to search for some focus and some new view with unfamiliar kit.

Sunday 11 November 2012

Using enlarger lenses

On "full frame" 35mm cameras and digital cameras with full frame sensors, the focal length from about 75mm to 100mm is incredibly useful, and not just for portraits, which is what many people think of this kind of lens as being "for". These lenses helps in composing, by being a little more selective in the view, but without losing the perspective completely. They also help by giving pictures a narrower depth of field.

Unfortunately, in the 1970s and 1980s, from whence most of our second-hand prime lenses come from, lenses of this type were not so common: the typical amateur seemed to jump from 50mm to 135mm and the space in between was a limited niche for professionals with a lot more money available. The result is it is quite difficult to get inexpensive lenses in this rather useful range.

I have been experimenting with alternatives. One of these is to use enlarger lenses, which were made in 75mm, 80mm, 90mm and 105mm focal lengths for medium format, and are now very easily and cheaply available.

Enlarger lenses on full-frame 35mm

Here I have used an old Olympus OM10 as my camera body. You could use any SLR or DSLR. The automatic Olympus cameras had an advantage that is quite useful: since they meter light off the back of the shutter curtain and off the film the actual settings presented to the camera by the lens are unimportant, so there's a better chance of getting accurate exposures. But other cameras will be able to get the exposures by other means.

The first, and main difficulty is to mount the lens. Enlarger lenses typically used a "Leica screw mount" or L39 mount (sometimes called M39, but that's not 100% accurate). I took a flange from an enlarger and the metal mount of a broken lens and glued them back to back to make an adapter.

Homemade OM/L39 adapter

With the adapter you should be able to mount the lens, but be careful it doesn't foul up the SLR or DSLR's mirror. (Some enlarger lenses protrude quite a long way back, I found.) The main problem is now setting the lens the right distance from the film to achieve focus. You might have extension tubes or bellows that will help here. I used an old L39 extension tube with a 75mm enlarger lens in this set-up.

Don't be put off by the fact the enlarger lenses are often quite small.

OM10 with Gnome Merlin 75mm f3.5 enlarger lens

As it happens, that gives me infinity focus. There is a tiny amount of adjustment available by screwing and unscrewing the lens a little way in the adapter. Or you can change the extension tubes you are using, or else get used to walking backwards and forward to get your subject in focus!

Don't forget the closer the lens is to the camera the further away it focuses, up to "infinity focus" after which bringing the lens still closer will not help focus on anything.

Enlarger lenses differ in their best focusing position. You will have to experiment. Sadly, it seems that the lenses of the most useful focal length want to be rather too close to the camera to allow a bellows to be used instead of extension tubes. But you may be lucky.

In the following I used a bellows with a 90mm lens.

OM10 with bellows, Ysaron 90mm enlarger lens and telek lens

The real advantage of the bellows is that it provides a focus control. As it happened, the bellows held the lens too far out to focus on infinity. That might not have been a problem if I was using the lens for portraits, but to get infinity I used an old friend - the negative telek lens I used a couple of posts ago. The telek (attached to the front this time) increases the focal length to about 100mm, a little longer than I wanted, but at least it gives infinity focus with this particular set of bellows.

My results from these lenses today are still drying after having been developed. I'll post an update shortly with some of them!

Saturday 3 November 2012

Kodak Linagraph Paper

I was experimenting with some stuff called Kodak Linagraph paper today. I really can't find much about it on the web, but it seems rather wacky...

Kodak Linagraph paper

Paper negatives

My favourite quick-and-cheerful method for testing new equipment, especially lenses, is to use paper instead of film in the camera. This can be done with any size camera - you need to cut photographic paper to size and perhaps tape it in place inside the camera. Of course this has to be done in the dark, but the advantage of paper is that everything can be done with an orange safelight, so there's no fiddling in the dark.

For large format cameras it's especially easy to load film holders with paper. You may need to be prepared to trim the paper slightly because (believe it or not) 4x5 film is smaller than 4x5 paper (that's the surprising bit) and film holders are designed for film not paper (that's less surprising).

Paper can be exposed like film. It is not sensitive to red light or to much green light much, but in daylight that's not much of a problem. Depending on the paper I expose mine at 2,3,4,6 ISO or higher in daylight. 3ISO is five stops slower than 100ISO. I take my light readings at 100ISO and calculate from there. There's a further advantage that exposures are typically a second or more, so shutters can be dispensed with in favour of the old manual method of using the lens cap as a shutter.

The other advantage is that it's easy to have trays of developer set up in the darkroom, so that (at least if you are shooting your tests in the back garden, which is what I do) each shot can be developed and inspected before the next is taken. Paper is also much cheaper than film.

For Ilford Multigrade paper, which is a little on the slow side but is one of the commonest kinds, I use ISO 3 as a starting point. Others are a bit faster.

After processing, the paper is washed and dried as usual and is scanned on a normal flat bed scanner. If your scanner is reasonable you should be able to get enough detail from even a 35mm negative. No special negative scanner is needed. Of course you will need to invert the tones - you might be able to do this in your scanning software, or any digital processing software will do this. (I use the Gimp.) Less obviously, the image you get will be a mirror image, so a "flip" transform (either left-right or top-bottom) may be helpful, but this is easy in software.

Linagraph direct print paper

I got a quantity of this stuff, which looked like it was worth a try. But it's not designed for normal printing. So on this occasion my paper-negative tests were testing the paper, not the lens. I chose a safe, dependable lens (which was in fact an enlarger lens, but quite good enough for the purpose), fitted it to the camera, loaded some of the paper into the holders and had a go.

A typical negative I got looked like this.

Kodak linagraph - negative

After letting the paper dry and then scanning it and processing it, this was the picture I got.

The garden in autumn

Pretty good really. There's a nice warm colour, due to my colour-inversion and the fact the paper is slightly cool. The paper appears to be sensitive to green, unlike normal papers, and is quite fast. (I exposed at 16ISO and developed slightly long at 2.5 minutes in PQ universal developer, 1+9.)

Conclusions

Other people may have found some of this paper, so perhaps my very early conclusions on it so far may be useful.

It is fast, at least one and perhaps two stops faster than normal paper. My sample gave a noticeable grey background, which is OK for negatives but not OK for prints. Next time I will try reducing the development time and increasing the exposure, hoping for better whites. Or a different developer might help.

The paper is very delicate when wet and scratches and other marks are very easy to make.

The instructions on the box say to use safelight filter 2, which is a red filter for fast orthochromatic films. Therefore a normal darkroom filter (which is what I used) may not be sufficiently safe. You should certainly experiment.

The pink colour of the emulsion is slightly offputting at first, but it does go when the paper is processed normally.

Solarisation

I thought it might be fun to try the paper in a completely different way, especially as I had no idea what it was specifically designed for.

The sun was bright so I pointed my camera towards it and set the shutter for a long exposure. (In fact, I used 2 seconds at f/11.) And shot.

My first attempt produced (unsurprisingly) a negative that was completely black. Rather than reducing the exposure I decided to reduce the development time, and to my delight, produced a negative in which the sun was perfectly white. After scanning, inverting colours and maximising the tones in the other areas (which are almost uniformly grey, but the scanner could find some slight differences) this is the image.

Black sun

That's not a negative, but a positive. The sun is quite white on the negative. The other features (for example, a dark doorway to the bottom right) are dark/bright as expected for a positive - everything except the sun.

And it is not hi-fi my any means, and the scratches seem very easy to make on this paper, but this reversal of very bright objects is a lot of fun to do when the materials are right for it. The effect is known, and is usually called "solarisation", but isn't the same as the "Sabbatier effect" (also often called soloarisation, and perhaps something for a future post). Solarisation worked really well with this paper, and much better than conventional paper I tested it against. So this might be an interesting application. More experiments are obviously needed.

Wednesday 17 October 2012

Photogram slides

I'm posting slightly early because I want to keep my target of one post per week for a bit, and I will be away at the weekend.

Photograms

Photograms are photographs without a camera. They are one of the earliest forms of photographic pictures, very easy to do, and never seem to be out of fashion.

The idea is that you place an object on photographic material (usually photographic paper) in the dark. You flash the paper briefly with some controlled exposure of light, and then develop normally. The result is white where the shadows of the object were and black everywhere else. Images of pressed flowers and plants work well.

I tried this using very old glass plates, dating to the 1950s I think. I made a 3.25x3.25 inch photogram of a fern on a plate and projected it using my epidiascope. (I used PQ Universal at a dilution of 1+9 for about 4 minutes as the developer. As the old plate was a bit fogged I used some ferri solution to clear the highlights.)

I have not made nor got a screen for the projector yet, so to try it out I projected onto a small square canvas. I photographed it all at dusk.

Garden fern

It was somehow nice to bring the fern back to the garden!

Layers

This is hardly "art" but for me it shows some of the essential ideas that I want to explore more: multistage processes with all stages contributing in "layers". All too often a photograph is a one stage click, from a single viewpoint with a single automatic or semi-automatic post-process (whether film or digital). But here we have,

  • The manufacture of the old plate itself, and its decay over time (giving, particularly, larger grain and uncontrolled white spots).
  • The pressed fern as raw material
  • The process of making the photogram, which was itself a controlled two-stage process with develop then bleach
  • The projection of the photogram using the old projector and old light bulb, with its own colour and quality
  • The texture of the canvas onto which it was projected
  • The location of the projection (outside, in the garden)
  • And finally, though it is certainly the weakest point in the whole process in the example above, the photographing of the projection and surroundings.

I find that each of these stages adds something almost intangible, but they all add up, and experimentation with ways of repeating these cycles might build up images with a quality quite special. Anyway, I want to try.

Saturday 13 October 2012

Negative accessory lenses

We are used to using positive lenses as accessory lenses, usually as close-up adapters. These are typically placed in front of the main lens and allow one to focus on closer objects that would otherwise be the case. They work by increasing the strength of the main lens, i.e. decreasing the focal length. They are usually quoted in dioptres: +1, +2, +3, +4, +10, etc.

Telek lenses

In the good old days there were plenty of other lens adapters. One particularly interesting sort is the Kodak Telek lens (sadly no longer made) which were negative adapter lenses. For example, this one fits "series VI" fittings and is -2 dioptre.

Kodak -2 Telek adapter lens

I suppose the reason these are not popular now is that most cameras have fixed fittings and to use a Telek lens on a camera on would have to move the lens further away from the camera. With the right camera, that could be done (just). You could add a Telek lens and an extension tube. Then the result would be a longer focal length, so would magnify more, a bit like a telephoto lens. Definitely worth a try if you have the necessary parts.

I had a Telek sitting in my box of spare parts for some time. I never quite found a particularly good use for it. Until, that is, an interesting vintage lens came in the post which I wanted to try on my 10x8 camera.

M.P. Tench lens

This lens dates to about 1880 give or take a few years, and is by M.P. Tench. Tench had worked with Dallmeyer until he set up on his own. This lens is a simple doublet with an aperture set back well behind, and might have been used as a landscape lens for 1/2 plate, or possibly 4x5.

The problem was that this lens was just a bit too small for my 10x8 camera and (to see it working as I wanted to, the bad parts of its image as well as the good) it was a bit too large for 4x5. The image it made on 10x8 was a circle, but I wanted it to fill the whole frame. I measured its focal length at about 150mm, and realised I wanted something just like it that was about 200mm.

Since my Telek lens increases focal length (at some loss in quality, which would not be significant when one is contact printing 10x8 negatives) it would be just the thing I need. There was a small matter of selecting whether to put the Telek on the front or the back. It turned out that it fitted beautifully at the back, which was probably the best place for it anyway. So that's what I did.

Rear of lens plate with mounted Tench lens

I mounted my Tench lens on a lens-board and fitted the Telek lens to its rear. Since it was a very good fit, and the Telek is very light, I just used blu-tack. Maybe I shall revisit this arrangement one day, especially if I decide this lens is a "keeper", but works surprisingly well for the time being.

That F number thing

One doesn't get something for nothing. By making the lens longer, but with the same amount of light going through it, the light intensity on the film is less. It is this light intensity that is measured by the "F number". (Or at least that's true without so-called "bellows factors", which we will ignore here.)

The rule that was chosen for F numbers way back is the F number is the focal length of the lens divided by the diameter of the aperture. So a f=50mm lens with an aperture 25mm in diameter is F50/25 or F2. This information is important for any new lens. I measured my Tench/Telek combination as f=200mm and aperture of 12.5mm so decided it was F16, which seems slow by modern day standard but is fairly typical of vintage wide angle lenses and perfectly adequate for what I wanted.

Testing it

Armed with the information about F-numbers I took my camera off to try it out. I loaded some film holders with photographic paper, which I find is much quicker to develop and scan for testing purposes.

For the first test I wanted to see how the lens behaved when focused at infinity.

Sparkhill park

This was a difficult contrasty subject, and I reduced the contrast here: any lack of contrast is not the fault of the lens. You can see in the corners where the lens is not quite covering the frame, but it gets close and the effect is quite pleasing. The lens has a very nice "antique" look to it, especially in the corners.

For the second test I want to to focus up close and study the out of focus background.

Sparkhill park

When focused close, there are no longer any coverage problems. Again, it is very pleasing look, with a noticable but subtle swirl in the background.

Sunday 7 October 2012

Camera fair challenge

There will be more on the epidiascope shortly. Today was the day of the Wolverhampton Camera fair, and as usual this was a lot of fun. And to spice it up a number of us made each other a challenge, which is the subject of this blog post.

Under a tenner

The challenge was to buy kit for under £10 and use it to take a photograph that very afternoon. That means there's little time for tinkering or mending and using additional kit from home is cheating.

One approach would be to get a cheap throw away camera. Another was to get a toy camera such as a Diana or similar, or a semi-working 35mm camera. Light leaks if any would be part of the fun.

I decided to put together an antique 1/4 folder from broken parts. I picked up a broken body with no lens or film holders and a cracked glass screen for £3, a old lens (not original to this camera, in fairly poor condition with non-working shutter) for £2, and from a separate stall got a small set of rather rusty plate holders for £2.

Old quarter plate folder

A number of people at the camera fair today had quite a lot of old glass plates for sale, and I love using these. I did a lot of searching in dealers' junk boxes and eventually bought a pack of 12 for £2.50 and that brought my total to £9.50 for the challenge. Unfortunately, in the heat of the moment putting everything together over lunch, I couldn't figure how to load the plates into the holders. Eventually I gave up and used some antique sheet film I had brought with me instead (bought on ebay for a similar price).

Quarter plate film

I used the film on the right. As you will see shortly, I would have been better with the glass. But the holders had metal sheet film sheaths in them, and these sheaths had rusted tight so I couldn't see how to get them out. Pity. (The sheaths come out by pushing them down against the spring at the bottom. A strong fingernail was needed to undo the effect of the rust gluing the pieces together.)

Putting it together

The lens and shutter goes into the obvious hole in the front of the camera and are held in place by a retaining ring. This ring was very difficult to turn, and I had to leave the lens in a somewhat wobbly state. (In fact, I found later it was not the correct ring as it had the wrong thread. What you get from rummaging through junk boxes.) I improvised a film canister lid as a lens cap and shutter. And loaded the film into the holders in the dark bag I had brought with me.

Old quarter plate folder

At least it's starting to look like a camera now!

I was lucky that the lens (a Beck Mutar 4.75 inch) I had picked was only a centimetre shorter in focal length than the one the camera was designed to take. So I could focus reasonably well onto the broken screen.

The plan was to use the lens on its smallest aperture (f32, or so the shutter said) and use the improvised lens cap as shutter for exposures of about 1s. This was rating the film at about 20ISO. The first attempt was a failure as the film came out of the holder when making the exposure. (It seems the holder is a little too large for the film, or the film too small. Both say 3.25x4.25" but the film does date 50 years after the holder.) I just about managed to succeed to make the next two exposures, but the fourth also suffered from the film coming out of the holder.

Results

I hardly expected the results to be hi-fi.... Note that I trimmed the negatives to be long and thin so that I can scan them with my 120 film scanner.

New camera

This was taken with the camera on the ground, and the lens wide open. At least it's recognisably an image...

Some spaghetti

This has a bad mark SE to middle E where the film accidentally came out of the holder and got folded when I returned the darkslide. It is also fogged at the top because the dark slide didn't go all the way. Ho hum. But at least it has some life to it, and apart from the film problem mentioned there are no other obvious light leaks or problems!

Saturday 29 September 2012

Rewiring the Epidiascope

So I have carefully looked over the 'scope and gave it a clean and brush down. More or less everything was in order, including the bulb which on testing it with my multimeter looked like the filament is still good. It's time to try to get it going.

It isn't just a matter of plugging it in. For one, the flex had been cut to the side of the 'scope and there was no plug. But more importantly the internal wires need checking over, are probably not safe, and probably need replacing. Especially on an old metal object such as this. As a minimum requirement, metal appliances need earth connections, which were not normally fitted in the "good old days", and should be fused properly too.

Earth

Apologies to people who know all this, but I will say it anyway. "Earth" is the third wire in the mains plug and is an important safety feature on appliances that are metal. The problem is that, without earth, all too often a wire gets frayed or damaged and accidentally gets out of place. Usually it falls onto or otherwise ends up touching metal somewhere, such as the metal of the case, or something connected electrically to the outside of the object. So anyone coming along who picks it up gets electrocuted. The solution is to wire the metal parts that people might touch to "earth", then if a wire gets frayed and loose it makes a connection to the metal, which is also connected to earth, so a short circuit occurs. This is still dangerous without fuses, but if fuses are fitted properly they blow on a short circuit, and the appliance fails, but at least it fails safely.

This old electrical appliance, like most old appliances, suffered two problems: no earth connection and very badly frayed electrical cable. In other words it was not safe. Here is the wire behind the main switch.

Switch before rewiring

The switch itself is metal and electrically connected to the case, so in the event of a wiring failure, touching the switch would be very dangerous.

So the wire needs replacing, earth connections need to be made, and the appliance must be run from an adequately fused line. (The British system is to have a fuse in the plug at the right rating for the appliance, as well as circuit breakers on the system at the distribution box.)

Wiring is not rocket science. You must assess what current will flow and whether the wire will heat up or not. Actually, all wire heats up slightly when used, but often not very much. Hot wire has higher resistance and resistance makes wire get hotter. So when wire gets hot, it heats up more quickly still. This can "snowball" (an unfortunate phrase in this context) into a fire. For my item, I expect that the bulb will get hot - but the wiring is not near the bulb, it is away from it and in the cooler area below the bulb. The internal case is large with a decent volume of air and there is also a fan. So heat is not a major problem. The bulb is rated as 1000W from a 240V supply so we expect 1000/240 or about 4 amps to flow. Play safe and make sure all the wiring and connectors are rated at at least 5 amps. (I used stuff I had in my shed that was good for 13 amps.) The fuse should be 5 amps, not the common 13 amp ones.

Apart from that, it's just a matter or replacing the old wire with the new, and making earth connections to the metal case in strategic places (i.e. electrically connected to any metal the user might touch, but hidden from sight as far as possible.) Here is the re-wired switch.

Switch after rewiring

I tested the wiring with my multimeter. I was also pleased to find that the switch switches both the live and neutral wires. (A useful safety feature in case that someone accidentally swapped over up live and neutral somewhere in the house's electrics.)

First light

The bulb in this projector is good sized 1000W tungsten filament lamp with a P40s connector. It is very delicate and was removed in advance of all the other work, so it's time to put it back and try everything out.

1000W tungsten bulb

I was lucky, and it worked first time!

Epidiascope: first light

But even 1000W is not very impressive in full sunlight... I must try it at night time next, and with some slides.

Sunday 23 September 2012

The Ross epidiascope

It's been a long time since I posted here - sorry folks. The day job got in the way, and then somehow I got out of the habit. I'm going to try and post about once a week for the next few weeks. (Maybe once a fortnight might be more realistic.) Let's see. Anyway the plan is to try something regular, if not frequent.

A Ross Epidiascope

I like old gear, and I like fiddling with old stuff to try and get it to work. And I like my photographs big. So when the possibility to buy a beast like this came up I went for it, even though I hardly need another project, and have only just enough space to keep it.

Ross Epidiascope

OK. What is it?

An Epidiascope is like an old-style slide projector or magic lantern and overhead projector built into one. It would have been used mainly for displaying images during lectures, talks and so on. So education was the main market, though no doubt they were used in cinemas, military etc. The gadget has a dual function, and I guess this is made economical because of the powerful light source.

Dia function

The more familiar function is that of a slide projector. That's the "dia" part of the name, from the Greek for "through", and in most languages but not English the word for "slide" is based on "dia". ("Das Dia", in German.) This slide projector is no ordinary 35mm projector like I remember being terrorised with by neighbours just back from their holiday. ("You must come round and see our slides.") Instead of projecting a 24x36mm image (or even a 56x56mm image if you are lucky enough to work with MF slides on a Hasselblad) the slides are three and a quarter inches square. So images of 80x80mm or so can be displayed, with correspondingly better resolution and punch. And instead of a perhaps 250W bulb, the epidiascope has a 1000W bulb for four times the brightness, or four times the area. That at least is the theory. I want to try it out.

The lens used is a 10.5 inch projector lens of about f/5. That was obviously intended for a fairly long throw, as well as coverage of the larger slide. I will have to see how it performs for me, but a wider lens might work better in my limited space. This is for experimentation as well. In any case the lens seems a good one and may also be useful as a taking lens for 4x5. Watch this space.

Epi function

The other function is the "epi" one, and this refers to projecting the surface of an opaque object or drawing. So in this respect the epidiascope behaves more like a modern day visualiser. The object to be projected is placed on a movable tray under the projector and can be brought flat against a glass underneath it. The light from the huge bulb is split into two paths and reflected off two mirrors in the side of the gadget. It illuminates the object, and the light reflected off it is reflected by a mirror and projected by a huge 17inch lens. The combination of the mirror an the lens restores the object to normal way round. (As opposed to upside down or mirror image.)

The area projected is about six inches (150mm) square. So quite large images should be projected. Once again, I need to try it to see how well it works in practice. Watch this space!

History

I have no idea how old this object is. Ross marketed models very like this as early as 1932 and up to the 1960s. Mine appears to be a later model as it has a fan added on the front. Mine is similar but not quite the same as this one http://www.curzon.org.uk/content/public/curzoncollection/RossEpidiascope.aspx and a contemporary advert for a very similar one is available on-line here: http://www.everystockphoto.com/photo.php?imageId=11740710. Mine is Type B.E model 2, which suggests it's not the oldest. More information would be gratefully received!

My plans are firstly to get it going and see how good it actually is. That means cleaning it carefully and re-wiring it inside. If the bulb inside is no good or blows, and it looks like I will continue to tinker with it I will probably replace the original bulb with a modern and more easily replaceable halogen one. I would also like to try making old-style three and a quarter inch slides. If all else fails these are very interesting lenses to try out. We will see...

Ross Epidiascope: open