Saturday 23 July 2011

I'll be back soon with more

I am going to be away on holiday for two weeks from tomorrow, and won't have time to post anything else today. There'll be more when I am back, or you can always look at my Flickr pictures at http://www.flickr.com/photos/richard314159/ for a sneak preview of some of it.

Miroslav Tichý

For now I shall just leave you with some words from the Czech photographer Tichý.

Photography is painting with light! The blurs, the spots, those are errors! But the errors are part of it, they give it poetry and turn it into painting. And for that you need as bad a camera as possible! If you want to be famous, you have to do whatever you're doing worse than anyone else in the whole world.

Friday 22 July 2011

Adding a filter ring

Old point-and-click film cameras like the famous "viv" and others are great, but there are a couple of obvious problems with them.

  • There is no exposure control: no alternate shutter speeds or apertures
  • There is no focus

All this can be easily changed with a very very easy mod. It will turn your cheap toy camera into something quite capable.

All you need do is add a filter ring.

Filter threads

A filter ring is just a threaded ring of metal taking a filter in one of the standard sizes. The standard sizes are all metric. Common ones are 46, 49, 52, 55, 58, 62... This means the diameter in mm of the thread. Actually another dimension is required: the distance the thread travels when it turns once round. For filters this is almost always 0.75mm. Thus you see filter threads written M49x0.75. (The M is for metric.) This is the same system as for the famous M42 lens mount. The M42 lens mount is in fact M42x1 as one turn advances the thread 1mm. In contrast the T2 lens mount is M42x0.75. That's why T2 lenses don't fit M42 cameras directly: an adapter is required. Unfortunately I see lenses sold on the bay as "M42" when they are in fact "T2".

To get or make a filter ring you need to take threaded a part of a lens or filter and remove all but the ring. In particular remove the glass. The first time I did this I smashed the glass because I couldn't see how to do it. Then it became clear. (No pun intended:) Some filters have a fine slim threaded ring that holds the glass in place and this can actually be unscrewed with something fine like a pair of jeweller's screwdrivers. Some have a sprung metal loop that has to be prised out. None I have seen is attached with glue.

Alternatively you can buy a stepping ring which is like a filter ring but with different threads on each side. Get one with the right size (M49, M52 etc) and right gender (male, female) that you need on one side. The other side doesn't matter. A step-up 49-52 ring has a male 49mm thread to screw into the front of the lens and a female 52mm thread to accept a 52mm filter. A step-down ring 52-49 has a male 52mm thread to screw into the front of the lens and a female 49mm thread to accept a 52mm filter.

Simply glue your ring on to your camera with epoxy adhesive. (The sort that comes in two tubes that you have to mix.) It helps if you scratch any shiny surfaces hard with a sharp knife or screwdriver first to ensure they will take the glue. Leave to set overnight and you are done.

For example

Vivitar ultra wide and slim with added filter ring

here I used a 37-46 step up ring, and

1950s Coronet 66 with added filter ring

where I used a 52mm ring salvaged from a broken camera

What to do with your modified camera

There are two or three main benefits of using filters. First is exposure control.

  • You know what speed your film is. You know (or can probably find out from the web) what the fixed shutter speed and aperture of your camera is. So with a light meter you will know how many stops your picture is going to be over exposed. Don't let it happen! Use a ND (neutral density filter) to stop the light by 1 2 or 3 stops (using a ND2, ND4 or ND8 respectively). Or (with care, getting the orientation right) you can use a polarising filter.

These cameras work so much better when the the light is just right and the film is being used to its best.

If you are using black and white film...

  • Try a coloured filter to get some different tonal effects!

For example an orange or red filter will make blue sky darker leaving white clouds white. If you also get the exposure right, a red filter can make deep blue sky almost black. A green or yellow-green filter is great for making leaves lighter.

  • Use a close-up to focus on nearby objects!

More on this in a moment.

If your filter ring is large enough, as it probably is, you can easily stack filters to get all these effects. If you are using black and white film your coloured filter will change the amount of light too, so if yuo are desperate or happy with the colour, you can used a red or orange filter like an ND8 or ND4 filter.

Using close-up lenses

Close-up lenses are one of the most common accessories and least understood. For my first serious camera I had a close up lens and a table of values of the form "with close-up +1 to focus at X set lens to Y". This is tricky and the table is nearly impossible to carry in one's head, or calculate on the spot, and is always left at home when you need it.

But the actual estimations you need are easy.

Let's suppose your fixed focus lens will "focus" from perhaps three metres to infinity.

  • A +1 lens is (as we discussed already in this blog) a lens with focal length of 1 metre. So the same lens with the +1 adapter added will focus up to but not much beyond 1 metre. It will focus from something closer than 1 metre to 1 metre itself, corresponding to the range 3 metres to infinity. In fact, with +1, 3 metres corresponds to 0.75 metres (I just did the calculation) so with +1 you get 0.75m to 1m.
  • A +2 lens has focal length of 500mm. So your lens with the +2 adapter added will focus up to but not much beyond 1/2 metre. It will focus from something closer than 1/2 metre to 1/2 metre itself, corresponding to the range 3 metres to infinity. In fact, with +2, 3 metres corresponds to 3/7 metres so with +2 you get 3/7m to 1/2m.

And so on. I can't calculate any more. But I don't need to. I just need to know that +3 focuses up to 333mm and +10 focuses to 100mm. (These are distances from the close-up lens to the object, not the camera to the object.)

Let's see this in action. The following were taken with the Vivitar Ultra Wide and Slim (a really great toy camera with a wide 22mmm lens) with close-up filters focusing close and throwing infinity out of focus

Face to face Languishing Raining sunshine

I hope you agree that these are much more interesting, with better focus close-up - but mainly because of the lack of focus at infinity. Large depth-of-field isn't everything!

Scratching at the surface

I feel like I am only beginning to scratch at the surface of the list of camera tricks I want to share. But I don't want to get fixed on any one camera or device - like the big 20x24 camera. And talking of scratches, scratching or damaging film has so many possibilities.

Here is one I did a while ago.

Life on the edge

This was taken with an old 35mm SLR film camera, a standard lens and one of those fish-eye converter lenses that you put on the front. (They used to be, and sometimes are still called semi-fisheye lenses.) That's what makes the horizon curved and higher in the middle (I was pointing the camera down.)

Semi-fisheye lenses

Semi-fisheyes or fish-eye converters are designed to be used in conjunction with another lens (this is why they are "semi-") but can in fact be used on their own. (That's something else for later.) They are also very useful as bits of glass for lens hacks (more stories for later). I have picked up several, mostly about a tenner a piece, at various camera fairs or on the bay. If you add to that a tenner or so for a film camera, that's 20 quid for a fish-eye camera that is ten times better than the fancy-priced Lomo fisheye camera that costs more than twice the price. Which would you prefer?

If you use a semi-fisheye you need to know that you must stop your lens down small (to f/16 say) to get anything like acceptable sharpness across the whole frame. Or you can use your lens wide open to get that dreamy effect with the centre sharp and the edges blurred. You won't get a 180 degrees circular image with a semi-fisheye on a standard lens. But you might with a semi-fisheye on a wideangle lens.

Using an ultrawide lens is great for candid shots. The people near me had no idea I was taking a picture of them, as it looked like I was pointing in a completely different direction somewhere at the distant horizon.

For the image above the light was bright and I could stop down. But I wanted to make the image soft and interesting in a different way, so I took some wire wool (very fine) and lightly scratched the negative before scanning it. A little goes a long way and if you want to try this start by scratching very very light with very very fine wirewool. Or you can use the sharp abrasive side of a washup-pad, or (gently) some abrasive cleaning cream on the non-emulsion side. Whatever you do it is bound to be creative and interesting. Try to make your scratches match the image - either circular, or all in the same direction.

I cropped the image to avoid the circular edges, and scanned. I scanned the black and white image, but told the scanner it was a colour negative. The scanner cave me nice colours which I manipulated in the Gimp. Sometimes scanners give two-coloured images when you scan black-and-white as colour, one colour for the background of the negative and one for the silver in it. It's often worth scanning as colour. (Even as colour slide.) You can always photoshop it back to black and white if you want later.

Distressing with bleach

There are other ways of damaging negatives to good effect. In the next one, the negative was damaged using common household bleach (sodium hypochlorite, or "thin bleach", not to be confused with what is sometimes called "thick bleach" nor with what photographers sometimes call "bleach").

Windswept

This process was rather more random. It relied on a bit of luck: bleaching the negative until two of the negative layers were removed, but the third remained, and the way the scanner (and my post processing software) treated it. The bleaching effect was different near the sprocket holes in the film, which is what causes the painterly-like brush strokes in the sky.

Using auto-equalise

For those that use the Gimp or other equivalent photoshop-like programs, some very interesting mixed film/digital effects can often be got by taking a picture with almost no detail and post-processing it. You take your picture, by perhaps massively under- or over-exposing, or perhaps by removing much of the detail (as I did here distressing the negative), or you photograph using old film that's no good, or in some other way. Then you scan what looks like an appallingly bad negative. You might usefully scan it as if it were colour when it is in fact black and white, or as slide when it was negative, or both, and use "auto-equalise colours" in software.

The way it works is this. Your original has a little detail in the image itself but not much. And what it does have has been produced right on the edge of what the film was designed to do, so is likely to be much less than perfect. But there's lots more going on in an analogue negative: grain and grunge and whatever. What auto-equalise does is expand this detail to fill the whole tonal and colour range. It exaggerates all the tiny nuances on your negative, which are often scratches or blemishes, or poor tonal or colour rendition of the film that was already pushed to its limits, and makes them become amongst the most important features of the image.

Another way of understanding what's going on is that it is the combination of the digital and the analogue. The analogue processes introduce imperfections that are exaggerated by the digital processes. There is not much information from the image itself, but there is information in the analogue imperfections, so all this information creates a rich picture. On the other hand, if you digitally make an image with little information and then amplify it digitally, you still get an image with little information.

A lot of what I like to do is push traditional processes to their limit, possibly exaggerating them digitally or using an analogue way later. You'll find out that a lot of what is done in photoshop can be done in the darkroom too.

Remarks on bleach

Sodium hypochlorite isn't terribly easy to find in the shops nowadays. It is safe when used properly (and has been used for hundreds of years) but can be dangerous when mixed in a stupid way with certain chemicals. You don't mix it with thick bleach, or acids or strong alkalis or some other things like hydrogen peroxide. It isn't particularly environmentally friendly either. I get the impression that the powers-that-be (who think we are all stupid and are going to kill ourselves or do something criminal) are making it harder and harder to get. This is very bad. But I have some ideas of other chemicals to use instead, but that will definitely have to wait until I have done some more experiments.

Thursday 21 July 2011

Yesterday's photo

Here's the photo I took yesterday.

Garden study

There are lots of things wrong, most notably a light leak that comes as a big white splodge on the right. But I was happy with this: because there's no similar splodge on the left. That means the film holder I made works on one side. When I worked out which side is good, which bad (remembering that the image on film is upside down) I could see that one side is slightly better than the other. So all I have to do is fix up the other side too, and that does not seem so difficult now I know that all I have to do is make it like the other one.

Experimental design

There's another tip here. Every experiment should if possible test only one thing. Then you know if it didn't work what was wrong. I'd already tested the film and the developer I was using in another camera and knew that was fine. So that eliminates one possible source of problems. And so on. It's sometimes tempting to rush ahead and try lots of new things all at once, but it doesn't always pay in the long run.

There's something else strange about this photo, but not really so strange because I'd seen it before somewhere else and was half-expecting it. That's the big sideways-on moon-shaped curve at the top. This is because the lens I was using didn't "cover" the huge negative. This is a common problem with large cameras and easily identified. In fact some photographers made it almost a trade-mark, and used such vignetting due to lack of lens-coverage as a feature of their pictures. Eugène Atget was one such photographer.

In my case, I'd rather have this vignette when I choose to have it, and not leave it to chance. That means I will have to modify something to get rid of it, possibly introducing it again when I really want it. But I was surprised it was so noticeable - I was expecting the lens to very nearly cover the negative. When I had put this lens together I had calculated what to expect, and it wasn't supposed to be this bad. I checked my calculations, they were OK. Eventually I decided to check the +1 close-up lens I was using.

The focal length of a lens

A good quick way to estimate the focal length of a lens is to project an image of the sun (which is effectively "at infinity") onto board or paper and measure the lens-to-image distance. (I will have to say more about this later too.) In my case it was about 650mm, and the lens was supposed to be +1 dioptre or 1000mm. That's appalling - very inaccurate. Soon I will be measuring the focal length of some of my other lenses to see if they measure up to what the manufacturer says.

When I redid the calculations with 650mm they came out in line with what I had observed. Again this is bad news in a way, but good in that one more variable has been eliminated. And so it will go on.

Scratches

To finish today, here is a detail from that 20x24 image.

Detail

Close-up you see a nice feature - lots of little scratches on the film. This really is an interesting film-hack to know about. There are some wonderful effects with scratched film that would take a photoshopper a month of Sundays to make. (Or do you buy things in photoshop?;) But again, I don't want them all the time so I will have to investigate. There's a clue - all the scratches are parallel. That means I think that they were made when the whole film slid as one piece either cutting or mounting the film in the holder. Another thing to investigate.

Wednesday 20 July 2011

I took a photo today

I took one photo today, and I am exhausted but happy.

This one photo is with my very biggest camera. It takes negatives that are 20x24 inches (500 by 600mm). Although it's not strictly speaking a camera mod, it's definitely a camera hack, and it deserves a place here, though it is my most ambitious project so far, and it will take a while to explain all the various parts of it.

20x24 is the largest size negative for which is it still comparatively easy to get normal film. Adox black and white film is one possibility. It is just over £150 for ten sheets. When you think that a single sheet is about the same amount of film as six 24-exposure 135 films (35mm) £150 isn't too bad really. But it's frightening to know that that so much film can be used in one photograph.

20x24 cameras used to be, and still are, commercially made. Not surprisingly they cost five-figure amounts.

Now, I can't afford £150 for ten shots (let alone the price of processing) right now, but might consider it for special occasions. I certainly can't afford £10000 for a camera, so my 20x24 is done on the cheap. It's almost entirely homemade. The only part that I didn't make was a lensboard (and this was just out of laziness - I happened to have one that was suitable, but I could have made something out of plywood). The camera's made out of MDF with glue and paint and velvet, a large sheet of glass which I frosted myself, and the lens is some random lenses that have been put together in the home-made-lens style. The details will appear on this blog later.

The film is some printers' lith film that I got quite cheaply on the auction site in a roll, and I cut it when I need it into 20x24 sheets. It works out at about 50p a sheet. This kind of film is not designed for pictures but for hard-edged graphic use. So how it can be adapted for making pictures is another story to be told.

Of course you could ask (and are probably asking) "why?" Well again, it fits the overall story here: modern cameras are just too good and I want an interesting bad camera, preferably one that takes interesting pictures that no other could. There are plenty of ways my 20x24's pictures are quite different from those from your digital, or even your normal film camera. And I think with a bit of work they might sometime soon be better, in their own way. I'll have to convince you of that later too.

So all this is for more detailed explanation later. Probably what you want most of all to know right now is what the camera looks like. Well here it is.

Front of my 20x24 camera Rear of my 20x24 camera

It's not something to put in your pocket. It's not something you'd use to take a picture quickly. But perhaps it will produce pictures that are rather different.

This is what I did today.

  • Cut a sheet of film and loaded it into the film holder. (1/2 hour)
  • Set up the camera, pointed it, focused the lens, measured the light and calculated the exposure. (1 hour)
  • Removed the glass on the camera and replaced it with the film holder. (5 minutes)
  • Took the picture. (15 seconds)
  • Put the camera away. (15 minutes)
  • Developed the film. (1 hour)
  • When film was dry, contact printed it onto a sheet of photographic paper. (1 hour)

When I am a bit more used to this beast, many of these tasks will be quicker, but that's not really the point.

This was my third picture with the camera, and I am still tweaking the camera, fixing the things that are wrong with it and making it easier to use. I can't show you the picture I took today yet, because it is still wet and drying. Nor can I scan it because my scanner is for A4 maximum. But sometime I will take a digital photograph of it.

Paper negatives

To save time, when I did my first picture with the camera I used a useful trick that can be really helpful for anyone messing about and learning on large format cameras. That is, I used a sheet of photographic paper instead of film. I'd done this previously with my (much smaller) 4x5 inches camera and it taught me a lot. The idea is that you miss out a major stage in the process - the film developing. And paper is much easier to handle because it can be done under red safelights, rather than full darkness. So for my first 20x24 picture it made sense to do it again.

Of course this results in a negative on paper. (Hmm: paper negatives. That's a good topic for later too...) For my 4x5 paper negatives it was easy to scan them normally and photoshop them (in the Gimp of course:), inverting the tones and adjusting the contrast or curves as you would do anyway in the darkroom. The results were really pretty good. Unfortunately I couldn't scan my 20x24 paper negative. But I did persuade a friend to take a photograph of me holding it up. And then I photoshopped this, inverting the tones and adjusting the contrast on the computer. The result is this.

My first 20x24 image

Tuesday 19 July 2011

From multiple exposures to slitscans

Here's a nice trick that will make the owners of a simple point-and-click roll-film camera proud.

These cameras usually have self-cocking shutters, which means the first stage of pressing the shutter release tensions the spring in the shutter, and only the very last bit lets the shutter go. (You can pride yourself on your wonderful shutter action. Most more expensive shutters work in two stages with a separate cocking lever and release lever that is much less convenient.)

And cheap roll film cameras rarely have fancy mechanisms to stop you clicking that shutter more than once on a single negative, like the expensive ones do. That makes these cameras really good to use.

The sort of cameras I am thinking of look like these:

Ilford Envoy (style 1) Coronet 6-6 Ferrania Ibis 66

They are essentially the point-and-shoot pocket cameras of the 1950s. Often they are very elegant and attractive. They are always interesting, and usually they out-perform a Holga or Diana. They are also usually much cheaper. (But a Holga or Diana would do if you have one of these. Or even a box brownie or something like that as long as it takes 120 film, rather than 620 film which isn't available, or 127 film which is difficult to get hold of.)

Multiple exposures

So all you do is click several times and take multiple exposures.

Either take two exposures in different places that you think will complement each other,

Crocuses

or try to hold the camera still (better still put it on a tripod, but sadly many of these kinds of camera don't come with a tripod thread) and take several pictures one after the other.

Echoes

This blog is not going to be just a catalogue of cool effects though. It's also about how to make these cool effects cooler and better. So you are in control.

If you are doing multiple exposures there are two things to know.

  • Your exposure values must change. So if you are using two exposures on the same film, the film will see twice the amount of light. Four exposures is four times the light. This means if you think ISO400 film would give you good exposures one particular day, double exposures on ISO200 film should be about right too. So would be a quadruple exposure on ISO100 film.
  • The multiple exposures will tend to "muddy" the image. That means the various exposures will tend to even each other out to give a uniform grey. So: multiple exposures reduce contrast.

If you are in charge of all stages of the process you can do something about contrast. Push-processing (i.e. exposing film at high speed and increasing development, e.g. exposing a 100 film at 400 or a 400 film at 1600 and developing longer to compensate) increases contrast. Do this if you can. Or you can print your image on high contrast paper. Sadly both of these are beyond most people who send their film to labs: if you are one of these, expect to have to use a photoshop-equivalent to increase contrast on your scanned negatives.

Panning

Here's a variation of the same trick. Take a picture and then wind on the film and move the camera a little bit. Then take another picture and wind on the film a bit more and move the camera again. Carry on a dozen or maybe more times.

Such as here.

Bricks and blocks come

Or here.

Spaghetti skyline

(This set also had a light leak, which shows these are not unique to Holgas or Dianas either. More on this later too.)

If you are clever or lucky your panning might equal or nearly equal the movement of the film. (Hmmmm... which way to pan? it depends on which way your camera pulls film though. Don't forget the image on the film is upside down. Here's a puzzle for you. Which way should you pan your camera? The answer's easy if you can flip your brain into a mirror image and then turn it upside down.)

Quick trick brick stack Let's do tricks with bricks and blocks

Adding a slit

Finally, here's a camera mod, rather than just a different way of using the camera. For this very easy mod, cut some black card and glue it inside the camera making a small vertical slit maybe 5mm wide.

Modified Ilford Envoy

Then the click-wind-and-pan action only takes single exposures, albeit very long thin exposures. (OK you'll have to learn how much to wind. Maybe they will overlap or maybe there will be gaps. That's part of the fun.) With some practice, and perhaps some creative cropping you'll get something nice.

Oranges Passing a cycle shop

A very thin slit with a camera that's panning is the principle of a slitscan. If we can make the panning and the film-winding smoother, and the slit thinner, we get a completely different way of taking a photograph with a normal camera. This will be taken up later too.

The delights of lens making

The mod described here will introduce you to the delights of making your own lens for your SLR or DSLR.

You need a camera that takes interchangeable lenses for which the viewfinder works through the taking lens. That's a (D)SLR. The shutter of your camera must be in the camera itself, not the lens, and accessories like extension tubes and bellows should be inexpensive. This rules out most medium format SLRs, which isn't much of a problem. If you don't have a digital SLR you can buy a 35mm film SLR for around £10 on the auction site or at a car boot sale. With the right choice of camera, the accessories you need will also be very inexpensive.

But hang on. Lens-making is very difficult!

Lens making is difficult, simply because of the technical, engineering and mathematical task of putting together a lens that views the world perfectly as it scientifically should. But don't forget what we are doing here. We are trying to use our cameras to produce images that are not perfect. That means our lenses need not be perfect. As long as they focus they should be fine... Actually, who says anything about them having to focus?

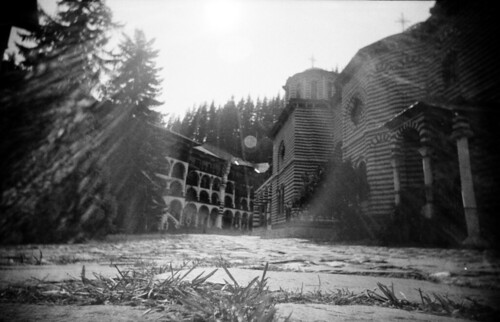
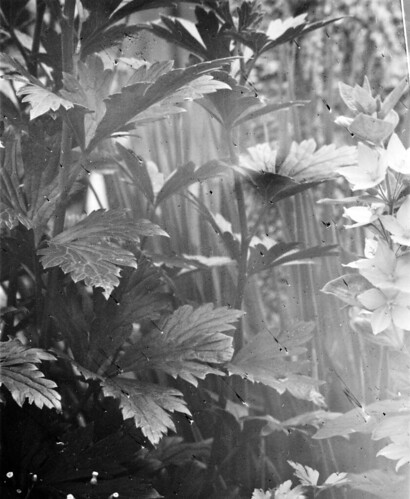
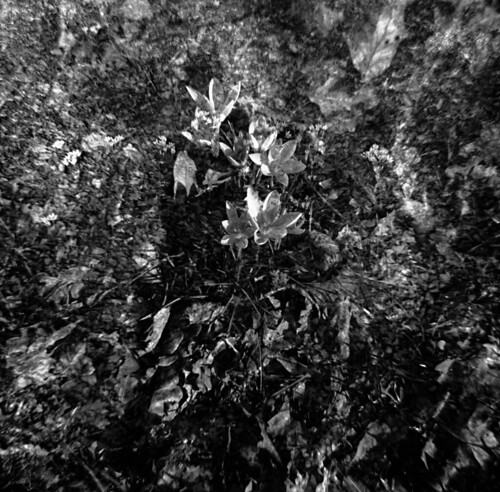
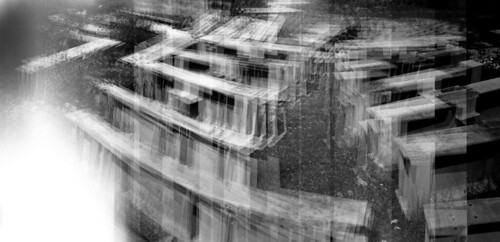
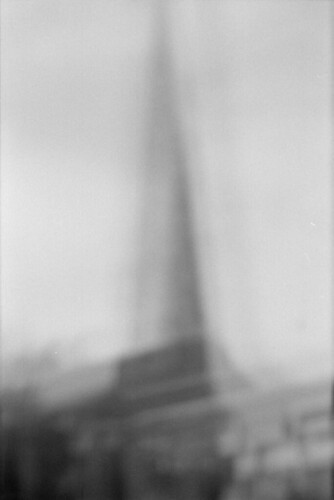
Here's one made with a home-made lens that doesn't focus:

Uncertainty principle

You can try anything, and it is bound to be unique and individual.

By lens-making I don't mean grinding the glass by hand. I mean assembling pieces of glass you've collected from broken cameras or other sources (maybe a magnifying lens from the local market) and using these.

The hardest part is in making some sort of mount for the glass that attaches to the camera and holds everything rigid in the right place. In this blog I am going to suggest what I think is the simplest solution to this problem, using standard parts that are easily available. This isn't necessarily the cheapest solution, but it won't break the bank either.
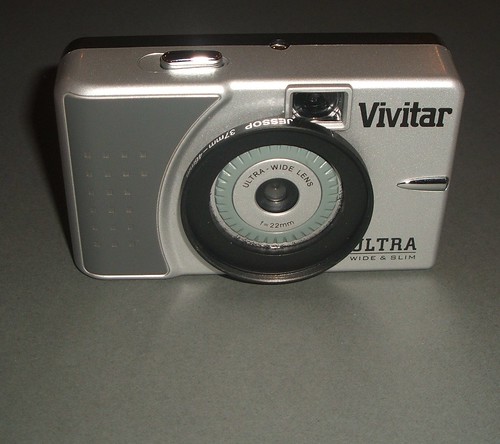
Close-up lenses

So-called "close-up filters" or "macro filters" are usually nothing more than magnifying lenses set in a mount with a screw thread. That's half the task done. All we need is to attach it to a camera.

Reversing rings

Fortunately, a special gadget called a reversing ring does just that. Almost. Actually a reversing ring wasn't supposed to attach a filter to a camera directly, but was supposed to attach a normal lens to a camera the wrong way round. (That's the "reversing" bit.) So the ring screws into the camera and accepts the thread on the front of the lens. This is the filter thread, and just about all filters are "double threaded" meaning they have threads on the front and back. So with a reversing ring you can also attach a filter to a camera, the wrong way round.

The lens-police aren't going to notice if our filter is the wrong way round. (But you might notice something subtle about the differences for your particular filter - more on that later.) So with the reversing ring we can use our close-up filter as a lens. But when we look through the viewfinder everything's fuzzy. Can't we do better?
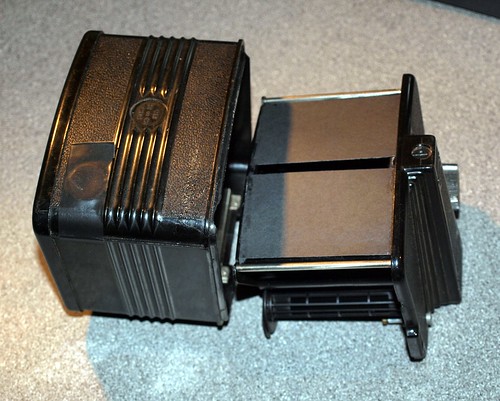
Bellows

Well yes, but we need to focus. Which means move the close-up filter the right distance from the film or sensor. For most close-up filters this means moving it further away, and the trick to do that is to put a bellows between the reversing ring and the camera.

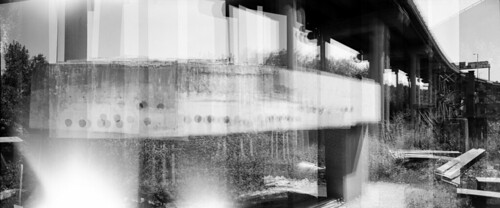
When you do this you get something like this.

Close-up lens fitted to 35mm SLR

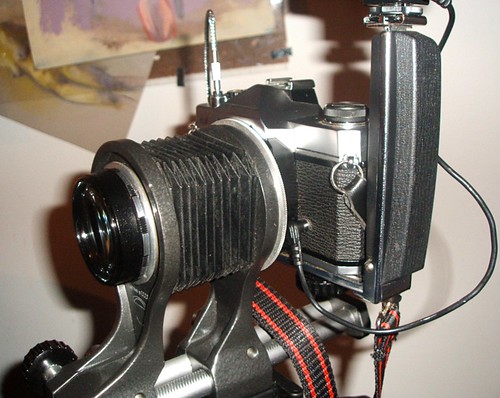
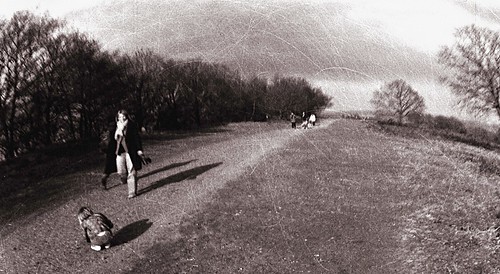
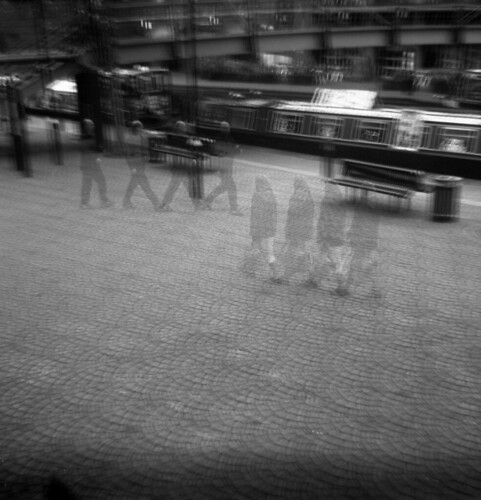
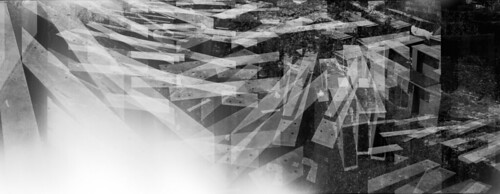
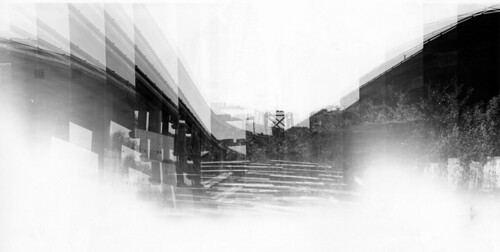
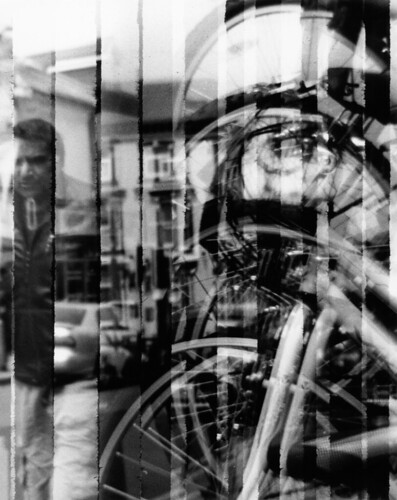
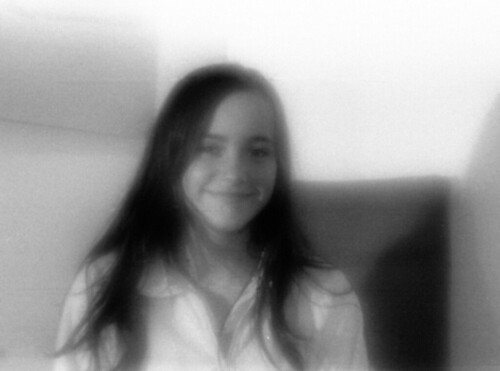
Here comes a wee bit of mathematics. The right distance for the filter to film/sensor to use is the focal-length of the lens. (For focusing closer objects you will need a little bit more than the focal length.) close-up lenses are called +1, +2, +3, +4, etc, with 1,2,4,10 being the common sizes. The +1, +2 etc number is the reciprocal of the focal length, in metres. That means +1 is 1/1metres = 1000mm. +2 is 500mm, +4 is 250mm and +10 is 100mm. The +10 makes quite a useful lens this way. It produces a very soft image and is slightly "long focus" so is good for portraits. Here is it in action.

Anna

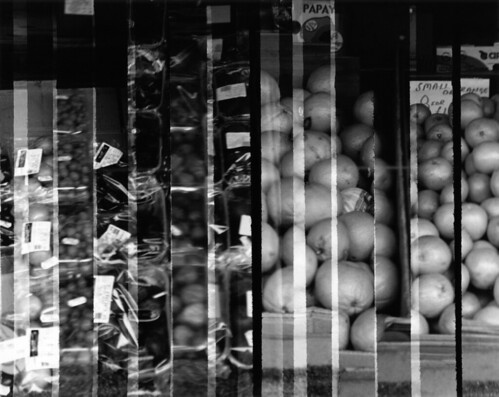
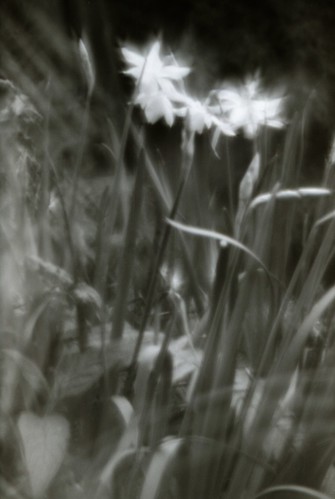
An alternative approach to using a single lens is to combine several close-ups. A +4, another +4 and a +1 makes (effectively) a +9 with a focal length of around 111mm. Here is this combination.

OM2 with bellows and +4 +4 and +1 close-up lenses

Which gave this.

Daffodills

Suggestions for which equipment to buy

I will close by saying a few words about choice of equipment, especially with a view to reducing costs.

The bellows will be the most expensive item. Bellows are made for all cameras, and perhaps you have bellows for your camera already, in which case use those. The cheapest bellows to buy on the auction site is usually for so-called M42 cameras. These include earlier Prakticas, Pentaxes, Zenits and Fujicas, as well as a number of others such as some Yashicas. If you have a DSLR you will probably find that an M42 adapter is an inexpensive way to fit M42 attachments to your camera, so you should get one of these. Alternatively you should standardise on one of the more popular lens mounts, such as the Pentax K-mount, the Olympus OM mount, or a Canon or Nikon mount. This will reduce the cost and increase the availability of parts later.

You also need a reversing ring. For this you should as far as possible choose your standard filter thread size. Look at all your lenses and work out what filters they take. (49mm, 52mm, 55mm, 58mm, 62mm are common sizes.) Choose a size that works for your particular lenses. If in doubt choose the one that works for your standard lens, rather than the others. (For example, I chose 49mm as most of my lenses near 50mm have that filter size.) Now get some close-up filters in this size and a reversing ring to attach them to your bellows.

It will help (for now) if your camera has through-the-lens metering or has automatic exposure. Most have this. Working out the exposure for other cameras will be a subject for later. (A little more maths is involved.)

This is just the beginning of the lens-making hobby. Be warned: it can get addictive. For much much more information, look here: http://www.flickr.com/groups/homemadelens/.

Camera Mods and Hacks

Digital camera manufacturers make cameras for all kinds of photography, especially the sort that is about record-keeping, advertisement or portraying a message in as simple a way as possible. Their job is to make their cameras as perfect as possible: to make them take pictures that can be measured scientifically to be as accurate and faithful to the scene in front of them and to remove the quirks that cameras in the bad-old-days used to produce irritatingly often.

Cameras are now very good, and in particular are excellent at giving us smooth gradations of tone on an LCD computer screen. With a few tweaks in one's favourite photoshop we can all look like we live in the smooth perfect world where film actors and actresses live and no-one ever has a single hair out of place. (I prefer the Gimp by the way, but "to photoshop" is now the accepted verb for the activity of editing in even the Gimp.)

For photography for advertising (even self-advertising) or for record and photo-journalistic uses, this is exactly what we want from our cameras. But for photography for art, especially photography that aims to make an old-fashioned printed picture that goes on a wall in our house or in a gallery, the "perfect" quality of the digital camera is lacking in exactly those little features and quirks that can bring it to life.

Of course, this is nothing new. Even film cameras were being pushed towards the end of their heydays towards the perfect machines for advertising. It's just that the digital revolution has taken this a bit further.

These pages are about how to tweak a camera - any camera, digital or film - back to producing pictures that might grace a art gallery as something special in terms of its quality of tones, textures, or something else. That's not to belittle the work of photojournalists, advertising photographers, or any other kind of photography. But these web pages are about a different kind of photography where the process of taking and making a picture is slowed down to enhance the qualities of the tones and marks on the image themselves.